This blog costs me $6 a month* to run and only took a couple hours to set up. I have complete control over it, and it should be able to scale to large numbers of readers.
This post is about how I set it up, presented as something of a tutorial.
* This is at the QUIC.cloud free tier, which caps out at about 5,000 page views per month assuming a typical 1 MB page. Additional traffic with this setup works out to about $1 per 100,000 pageviews. To put that into perspective, AdSense pays $30-$200 per 100,000 views.
Also, a brief disclaimer: I have not been paid in any way for writing this. I mention specific services and products only because I use them and think they work well. I have included referral links where I believe they will provide value to you and have marked them clearly. Consult the hover text for details. Your mileage may vary, please drink responsibly, etc.
Overview
| Hosting | Vultr[referral link] |
| Server | OpenLiteSpeed |
| Domain | Hover |
| Platform | WordPress |
| Scaling | QUIC.cloud |
Hosting
The basis of the blog, like basically everything I build online these days, is a Vultr VPS instance.
Historically, VPS hosting has been considerably more expensive and DIY than shared hosting, but Vultr is quite affordable and easy to use. For $5 a month (US) you get a virtual machine with 1 GB of RAM, a single vCPU, and 25 GB of SSD storage, which is plenty for my purposes. For $10 you can double all of that (except the vCPU) and everything scales linearly up from there. It’s very easy to migrate to a bigger instance down the line if you need to. For $1 more per month, you can enable automatic nightly backups, which I highly recommend.
By far my favorite thing about Vultr, though, is the one-click templates from the “Marketplace”. I’m not sure why they call it that since all the templates are free, but whatever. We’ll be using one of those templates to set up the blog.
If that sounds good to you, head over to Vultr[referral link] and sign up. Don’t forget to enable two-factor authentication. Good security is extra important for these sorts of services.
Platform
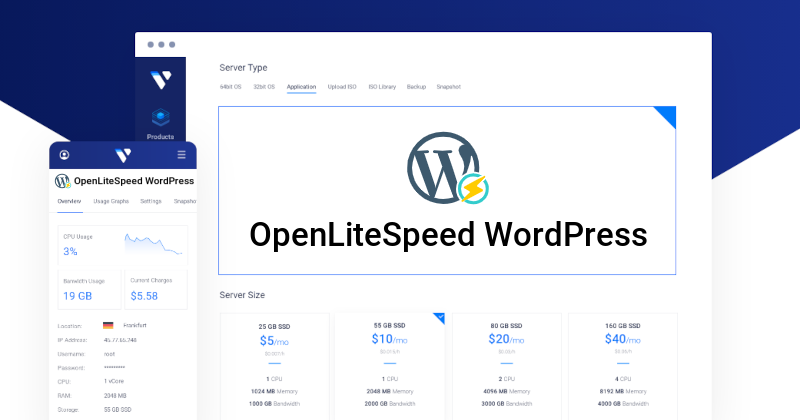
After signing up for Vultr, when you go to deploy an instance, you’ll see a few tabs under the “Server Type” section where it asks you to choose an OS. Select “Marketplace Apps” and search for “wordpress”. The OpenLiteSpeed WordPress template is the one we want.
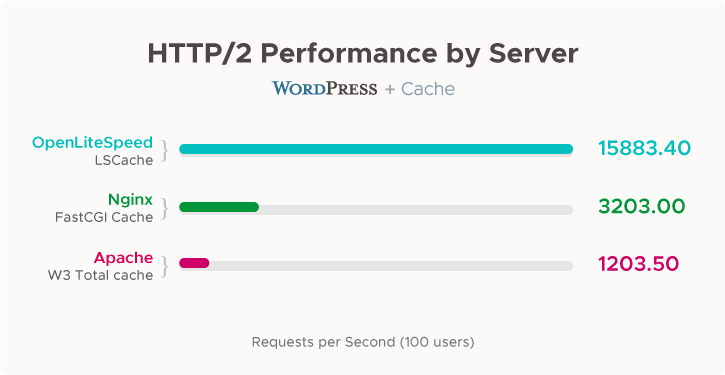
OpenLiteSpeed is a highly optimized web server and cache which massively improves the performance of a WordPress blog.
Sidebar: SSH
Before deploying your server, don’t forget to upload your SSH public key. If you don’t have one already, get into your system’s terminal and run this command:
ssh-keygenIf that doesn’t work, consult Google for instructions on how to get OpenSSH installed on your system.
Once you have your keypair generated, copy it to your clipboard. Here’s the command to do that:
| Windows | clip < %userprofile%\.ssh\id_rsa.pub |
| macOS | pbcopy < ~/.ssh/id_rsa.pub |
| Linux | xclip ~/.ssh/id_rsa.pub |
Then click “Add New” under “SSH Keys” in Vultr and paste it in.
You’re now ready to deploy your instance, so go ahead and do that.
Domain
While your deployment is running, head on over to your domain registrar of choice (I like Hover personally) and register a domain for your new blog if you haven’t already. I strongly recommend trying to get this right the first time, as it’s a pain to change later. I ended up migrating my blog from blog.cogspace.com to www.cogspace.com and it was pretty frustrating, mostly because of HTTPS.
Once you have the domain of your dreams secured, go into the DNS settings and create an A record (or edit the already existing A record for the @ host). Enter @ as the host name, then copy the IP address from your new Vultr instance and paste that in. Leave the TTL field at whatever the default is.
Next, you’ll need to wait for your DNS changes to propagate. This could take anywhere from a few minutes to several hours depending on your DNS provider, but 90% of the time it’s very quick. However long it takes, once your new domain name starts resolving to your new VPS instance you’re ready to proceed.
Platform
Time to set up WordPress! SSH into your VPS as root using your public key.
ssh root@<VPS IP address or domain>You will be prompted to verify the host’s identity (yes) and then prompted by the OpenLiteSpeed WordPress setup wizard to input a domain name. Fill in the one you’ve already configured the DNS for and enter “y” to verify it is correct.
When prompted to issue a Let’s Encrypt cert for your domain, enter “y” again and a valid contact email, and “y” again to confirm.
When prompted to force HTTPS rewrite, enter “y” for security’s sake. If anyone goes to http://your-blog they will be redirected to https://your-blog.
Finally, enter “y” again to update the system and start your blog.
Navigate to your new blog in a web browser and you’ll be prompted to set it up. Create an account, set a password, choose a title, and all that jazz.
Congrats, your blog is online! If you aren’t worried about optimizing for large numbers of readers, you can stop here. Otherwise, continue to the Scaling section.
Scaling
Go to your shiny new WordPress control panel and open the LiteSpeed Cache menu on the left, then select the General page.
Generate a Domain Key and connect to QUIC.cloud. When prompted, create a QUIC.cloud account.
Once your QUIC.cloud account is set up, go to your QUIC.cloud control panel and enable the CDN. If your domain registrar supports CNAME flattening or ANAME/ALIAS records, you can use the second option, but you’re on your own there. Hover doesn’t, so I’ll choose the first option and switch DNS control over to QUIC.cloud DNS. It was able to auto-detect all my DNS records and import them from Hover, but make sure to check this for yourself.
Once again, you’ll have to wait for DNS changes to propagate. Eventually this will finish and you’ll get the message “DNS Verified”. Finally you’ll have to wait 15 more minutes for QUIC.cloud to generate its own SSL certificate for your site.
Once your SSL cert is generated, Go back to your blog control panel, Go to the CDN page under LiteSpeed Cache, and switch QUIC.cloud CDN to “ON”.
That’s it! You are now running on QUIC.cloud CDN.
Cost Analysis
QUIC.cloud’s free tier will afford you 5 GB of traffic per month. If you need more traffic than that, you can buy additional credits at the following rates (as of September 2021):
| Credits | 5,000 | 12,000 | 25,000 | 130,000 |
| Traffic | 500 GB | 1.2 TB | 2.5 TB | 13 TB |
| Price (USD) | $5 | $10 | $20 | $100 |
| Price / 100 GB (~100k views) | $1 | $0.83 | $0.80 | $0.77 |
If this seems like a crappy deal compared to the 1000 GB of traffic you get for $5/month from the Vultr VPS, I felt the same initially, but keep in mind that instance has only one vCPU and could easily crumble under the weight of a Reddit hug or DDoS attack. Having a CDN in place to handle a sudden spike in load is a really good idea, especially since it will deliver content quickly around the world. And if you never go over the free tier, it won’t matter. Also, if you do exceed your limit, the fallback is to redirect to your origin host, so at bare minimum it’s 5 GB/month of free bandwidth.
It’s worth noting that to get the most out of QUIC.cloud CDN, you’ll have to put down some money, but a little goes a long way. I paid $10 for 12,000 credits and then deposited 1 unit of that (1,000 credits) into the CDN and enabled auto-refill. As long as you have any amount of paid credit in your account, you are on the Standard plan instead of the Free plan. The Standard plan comes with two main benefits:
- 68 PoPs instead of 6
- DDoS protection
Note that even if you have paid for credits, if you never exceed the 50 credits per month free tier, you will never use any of those paid credits, and unlike free credits, paid credits stay in your account and roll over indefinitely from month to month, so you can pay as little a $5 once, deposit your credits, and (as long as you stay within the 50 free credits per month) enjoy the Standard Plan benefits forever with no additional charges. Pretty cool deal!